Recently updated on April 3rd, 2021 at 09:46 pm
 |
Some of you might wonder how to create your own cool VR photos with low cost? The answer might just be around your corner. One of the way is to use an app from Google called “Cardboard Camera“. The result of the images is nearly in 360-degree and in 3D stereoscopic format.
We also have tried it ourselves by making our own VR scenery photos. And what we can say is that it is really easy and fun. And the good thing is it is free!! You may take a look at the steps below that show the whole process at a glance.
Our Steps On Using Cardboard Camera
Step 1: Get a VR Headset
We believe most of you already have a VR headset. At least the Google Cardboard or its equivalent.
Step 2: Already Installed Cardboard App
Please ensure that you already has the Cardboard app installed on your smartphone. If you already have the VR headset, then most probably you already had this installed to view the other VR stuff.
 |
Step 3: Download & Install the Cardboard Camera
This is the most important app for our small project. You need to download the Cardboard Camera app from the Google’s Play Store.
 |
Step 4: Open the App
Once installed, you can click on its icon to open the app. By right, below is the default display shown once you open it.
 |
Since now you are under “Shared With You” tab, you need to click on the “Your Photos” tab to start your next action. Since this is your first time, it will appear like this…
 |
Step 5: Capture the Scenery
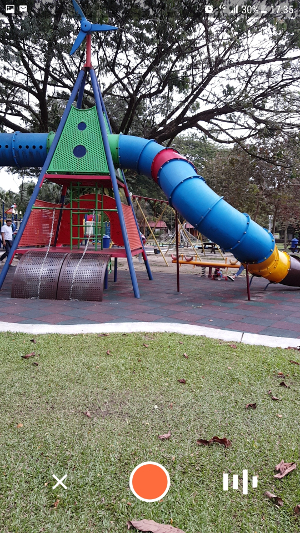
Okay, now you need to point your camera phone at the starting point of the scenery that you intent to record. Then you need to click on the “Camera” icon at the right-bottom of the screen. Once you click it, then it will show you this screen…
 |
What you need to do now is to click on the big orange button at the bottom. It will then show you this…
 |
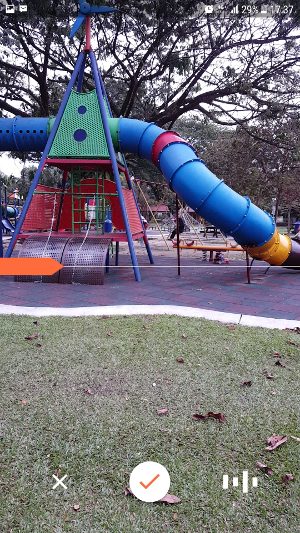
You’ll see a white horizontal line with an orange arrow or pointer in the middle of the screen. Here comes the tricky part. You need to hold your phone and rotate your body in perfect circle slowly and smoothly. You need to move it from left to right or clockwise. The arrow also will move accordingly. If you are too fast, then it will show message such as “Slow Down” or “Try again, moving more slowly“.
The best is if you can get a tripod to assist you while taking the pictures. By default, it will also capture the sound during the moment as well. When you nearly finish, it will looks something like this…
 |
Step 6: Wait until Processed
Once the orange arrow or pointer reach the end, it will show this display. Meaning to say the image is now in the processing stage to be stitched together. You might need to wait for a while. Perhaps, one or two minutes…
 |
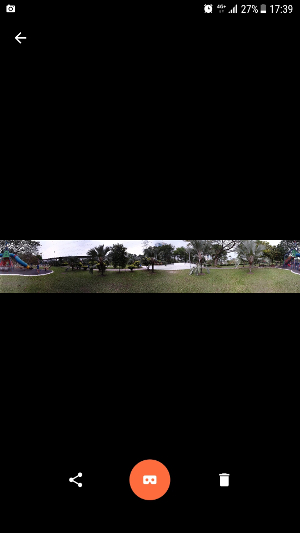
Once complete, it will be like this…
 |
Step 7: View it in VR
To view it, you just click on the images shown in the “Your Photos” tab. Then, you will see this screen…
 |
To view it in the VR mode, you need to click on the “Headset” icon in the middle below. Tadaaa!!!! Now, you can see it in the stereoscopic mode like below.
 |
This is the time to grab your VR headset and plug in your smartphone to experience the scenery in virtual reality mode and 360-degree. You can also hear the sound as well since it is recorded by default. If you do not want to record the sound, you can turn it off in the menu.
Step 8: Share it!!
Yeap. With the latest update last week in mid Feb 2018, you can now share it to your social media tools and email. You just need to touch the picture a little bit longer like two seconds, then you can see the “Share” icon at the top like below….
 |
It will generate short url if we share it via WhatsApp or email such as” https://goo.gl/vrphoto/blabla..“. And if we share it via Facebook, it will generate it as a post like below…
 |
And this is the result when we viewed it inside the Facebook…
 |
Cool, huh? We think this is the simplest way to produce the VR scenery photos. Although the steps above is for Android, but they also have the version for iOS as well. Although you may see some imperfect stuff such as some part of it is not well stitched or the blurry upper and below part, but we really recommend it for the beginners. Although it is not a perfect and accurate VR image capturing tool but it is worth a try. All the best, guys!!


