In this article, we will share with you the step by step on how you can buy or purchase apps from Oculus Quest Store. This might be useful for those that are first time doing this and want to know how the overall journey and experience looks like. Here, we are using the example from our experience buying the apps for Oculus Quest 2. Well, let’s proceed…
There are two ways how you can buy the apps:
- Via Oculus App on the smartphone or
- Within the Oculus Quest 2 VR headset.
In this following example, we will show you on the first approach which is via mobile phone. For us, we find it easy and comfortable enough since most of us already familiar in performing online transaction or doing online shopping using our mobile phone.
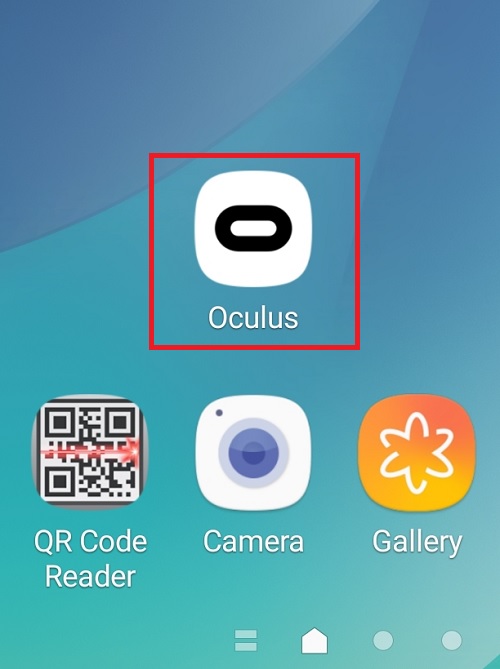
1) Open the Oculus App
First, you must click on the Oculus App icon on your smartphone. This is how the icon looks like…
 |
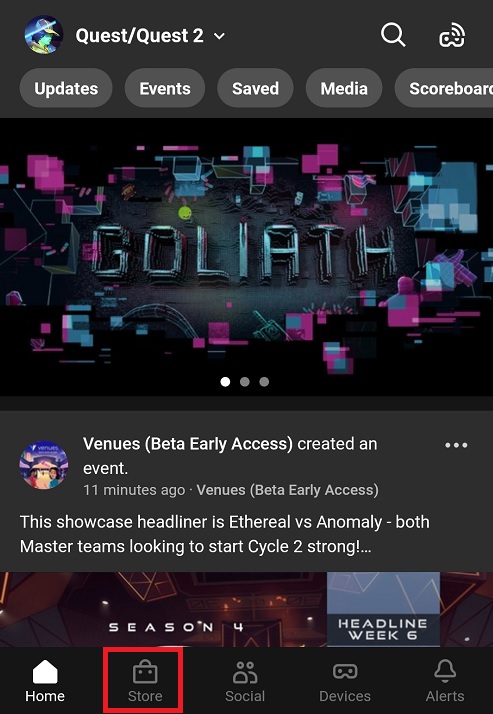
2) Click Store
Once the Oculus app is open, you can see the “Store” menu at the bottom. Now, click on it.
 |
3) Select Apps
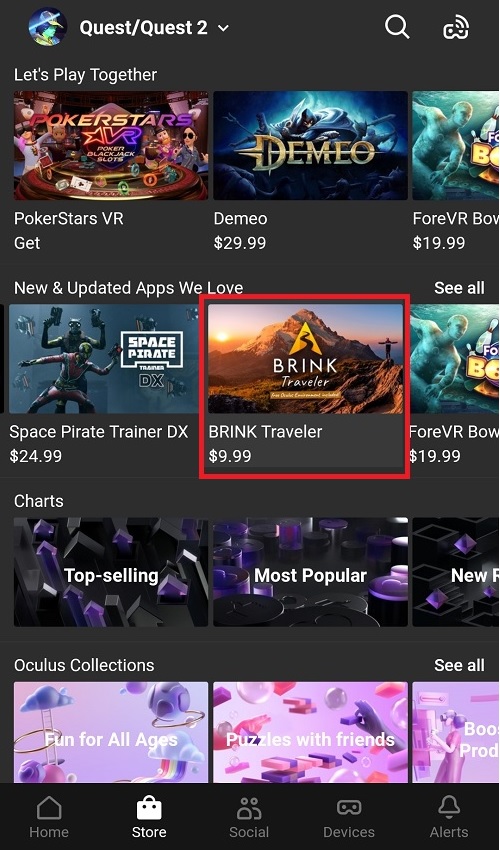
Next, you are now inside the Oculus Quest Store. You can see the list of available apps that you can buy or purchase. It will also display the price of the apps as well.
If there is Discount, it will show the Discount Amount (eg. -20%), Price Before Discount (eg. $29.99) and Price After Discount (eg. $23.99). If it is a Limited-time Deals, it will show you how much time or days left before it ended. For example, “Ends in 5 days” or “Ends in 4:07:48“. Something like countdown.
Now, choose the apps that you want to buy or purchase. Once you have decided, than you click on the Apps thumbnail. In this example, we will click on the “BRINK Traveler” thumbnail.
 |
4) Click Price Button
Now, you can see the dashboard showing the important information about the apps. Among the important information that you can see is the description of the apps, trailer, screenshots, rating and reviews, space required and many more.
These kind of information will further influence your decision making whether you still want it or not. If you still want to proceed, then you may click on the Price button located at the bottom.
 |
5) Add Promo Code
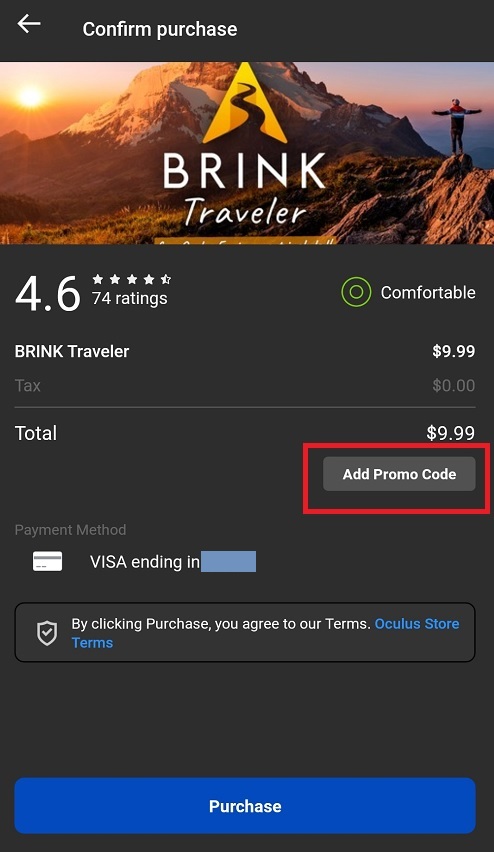
You are now in the “Confirm purchase” section. If you have the Promo Code (eg. OCULUS30), then this might be the suitable time to use it. Normally, you will receive the “Alerts” inside your Oculus App or the notification in Facebook to let you know that you entitled to get the Promo Code for Oculus apps.
If you have it, then click on the “Add Promo Code” button. Else, you can skip this step.
 |
6) Apply Promo Code
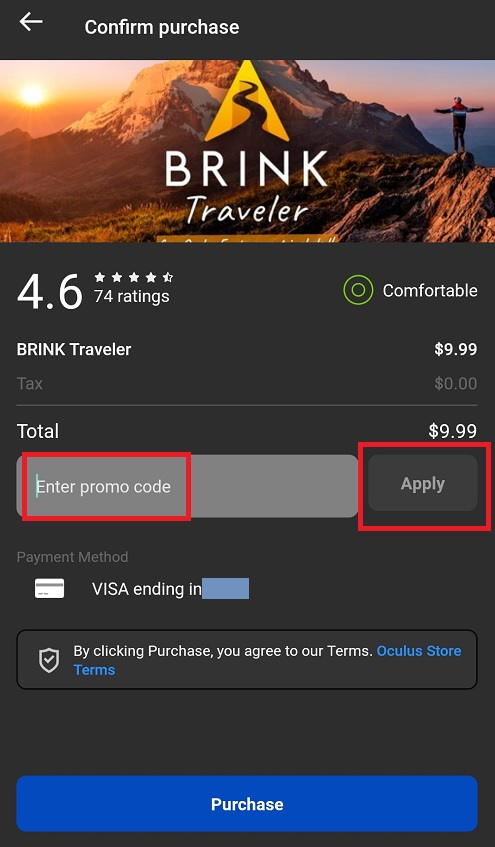
Key in the Promo Code if you have it. After that, click on the “Apply” button. If you enter the code wrongly or enter the invalid code or the code already pass the expiry date, this message will appears, “This code cannot be applied to your order“.
 |
7) Click Purchase
Still on the same page, click on “Purchase” button located at the bottom. Above the button, there is already a fine print that stated “By clicking Purchase, you agree to our Terms. Oculus Store Terms“. That should be the same standard practice for any online transaction process.
8) Enter Oculus PIN
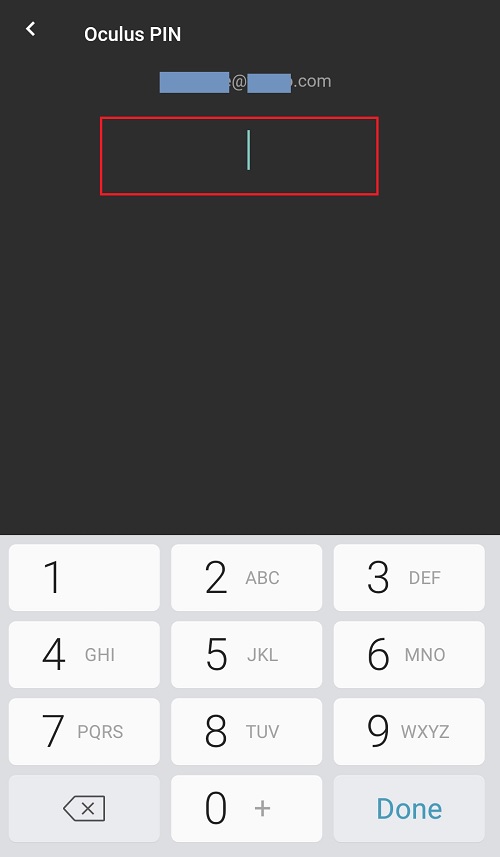
In this step, you need to key-in the Oculus PIN that you already registered previously during your initial Oculus Quest 2 setup. The email shown is the email that you use to login to Facebook.
 |
9) Installation Queued
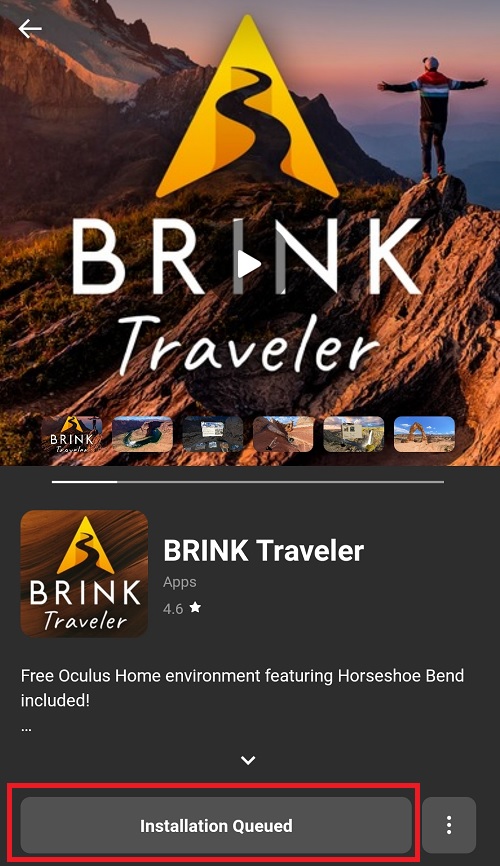
Once you finish key-in the Oculus PIN, you will be automatically redirected here. It will briefly show you the message to confirm that your transaction already success. When you go down, you can see the label on the button is now becoming “Installation Queued“.
 |
10) Installation of the Apps
Finally, you can wear your Oculus Quest 2 headset to begin the process of downloading and installation of the apps. You can do this anytime you are free or available. Not necessary immediately after Step #9.
Once you are inside your Home environment, you can see your apps inside your Apps Dashboard. Previously, we had to manually click on the “Install” button to start the process of downloading and installing the apps. Nowadays, it seems like the process start automatically without the need for us to click any button.
That’s all for now, guys. Hope this article on how to buy and purchase apps from Oculus Quest Store will give significant benefit to you.


