In this article, we will share with you the step-by-step on how to perform the Software Update for Oculus Quest 2. This guide is based on our real life experience when we update our Oculus Quest 2 from version 27 to version 28. Furthermore, we also share with you the screenshots during the process to provide more clarity to it.
Steps for System Update for Quest 2…
Below are the steps required for you to update your Oculus Quest 2 system.
- Click on “Settings” Icon
First, when you are in your Oculus Home environment, go to your universal menu bar. Here, you must click on the “Settings” icon.

- Click on “About” Menu
Next, you can see the “Settings” pop-up window will appear. Inside the “Settings”, click on the “About” menu.

- Click on “Update Now”
In this panel, you can see your current Software Version. In this case, the current version shown here is “27”. To proceed, you click on the “Update Now” button.

- Plug In Your Device
If the message “Plug In Device: Device must be plugged in to begin update. Please plug in the device before starting the update.” appears, then you need to do exactly the same as being told. Plug in your Oculus Quest 2 the same way like when you want to charge them.

- Click “Install Now” Button
After you have plug in your device, then when you do the Step #3 again, a pop-up will appear. The pop-up will display the message “Software Update: System Update is available. Make sure your device remains plugged in and powered on. Restart will be required“. Then, click on “Install Now” button.

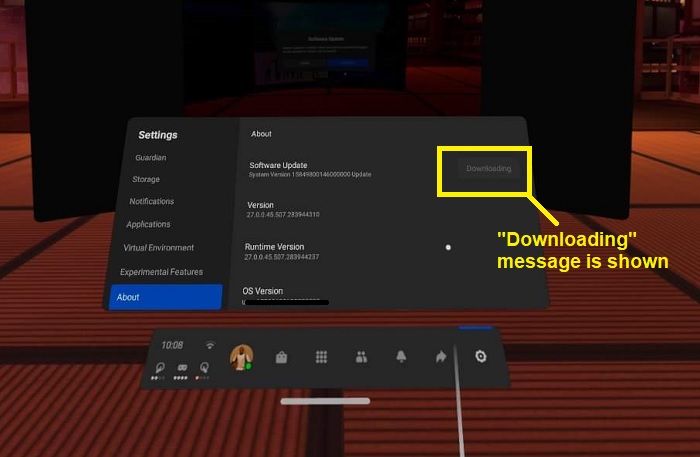
- Downloading Started
You can see the word in the button change to “Downloading“. It means that the downloading of the update is in progress. You do not need to do anything here, but you just wait patiently for a while until it finish download.
- Click “Restart and Apply” Button
After the download is finish, you can see the “Restart and Apply” button. As the last step to complete this process, click on that button.

- Big Oculus Logo Appears
Next, you can immediately see the big Oculus “O” logo appears in front of you. The logo will appear there for few minutes. You just need to patiently wait for it to complete their job.
- Successfully Update New Version
After Oculus Quest 2 successfully update the software version, you’ll be bring back to your Oculus Home lobby. Perform Step #1, #2 and #3 again and there you can see the version is updated accordingly. In this case, it shows our current version as “28”.

That’s all for now. Hopefully, it can guide and bring you the confidence to update your Oculus Quest 2 version. If you are still having difficulty when performing the update, you can reach out to Oculus Support website for further assistance.